为 GitLab 启用 Let's Encrypt 颁发的 SSL 证书
Let's Encrypt 是一家全新的 SSL 证书颁发机构,为用户提供免费、自由、自动化的证书颁发流程。我们可以通过 Let's Encrypt 申请 SSL 证书来为我们的 GitLab 提供 HTTPS 接入。
安装 Let's Encrypt 客户端
首先,通过 git 下载 Let's Encrypt 的客户端:
git clone https://github.com/certbot/certbot
cd certbot
./certbot-auto --help
(注:自 2016 年 5 月起,letsencrypt 项目改名为 certbot,letsencrypt-auto 工具改名为 certbot-auto。不过为了保持兼容性,克隆仓库时仍可使用 https://github.com/letsencrypt/letsencrypt,使用命令时也仍可用 letsencrypt-auto。)
申请证书
下载完 Let's Encrypt 客户端后,我们可以借助随 GitLab 启动的 nginx 服务器来验证我们的域名,进而获得证书。
./certbot-auto --agree-tos --email [email protected] certonly --webroot -w /opt/gitlab/embedded/service/gitlab-rails/public/ -d www.example.com
上述命令中:
--agree-tos- 同意用户协议。
--email- 首次申请证书时,需要邮箱地址来创建 Let's Encrypt 的账号。不过,并不会验证此账号。
- 邮箱地址用于接受证书过期提醒。
certonly- 只申请证书。
--webroot- 通过在当前运行的 web 服务器下存放验证文件来验证身份。
-w- 指定当前运行的 web 服务器的根目录。
- 对于通过 Omnibus 安装的 GitLab 的默认的 nginx 服务器的根目录位于
/opt/gitlab/embedded/service/gitlab-rails/public/。 -d- 指定要申请证书的域名。
证书申请成功后,会有类似如下输出:
Requesting root privileges to run certbot...
  /home/zzz.buzz/.local/share/letsencrypt/bin/letsencrypt --agree-tos --email [email protected] certonly --webroot -w /opt/gitlab/embedded/service/gitlab-rails/public/ -d www.example.com
Saving debug log to /var/log/letsencrypt/letsencrypt.log
Performing the following challenges:
http-01 challenge for www.example.com
Using the webroot path /opt/gitlab/embedded/service/gitlab-rails/public for all unmatched domains.
Waiting for verification...
Cleaning up challenges
Generating key (2048 bits): /etc/letsencrypt/keys/0001_key-certbot.pem
Creating CSR: /etc/letsencrypt/csr/0001_csr-certbot.pem

IMPORTANT NOTES:
 - Congratulations! Your certificate and chain have been saved at
   /etc/letsencrypt/live/www.example.com/fullchain.pem. Your cert
   will expire on 2017-07-22. To obtain a new or tweaked version of
   this certificate in the future, simply run certbot-auto again. To
   non-interactively renew *all* of your certificates, run
   "certbot-auto renew"
 - If you like Certbot, please consider supporting our work by:

   Donating to ISRG / Let's Encrypt:   https://letsencrypt.org/donate
   Donating to EFF:                    https://eff.org/donate-le
得到的证书及私钥存放在 /etc/letsencrypt/live/www.example.com/ 目录下,其中
-
cert.pem: 网站自身的证书; -
chain.pem: 网站证书链中的上级证书; -
fullchain.pem: 包含了网站自身证书和上级证书的完整证书链; -
privkey.pem: 网站自身证书对应的私钥。
更新证书
由于证书的有效期为三个月,因此我们需要定时执行以下命令来更新证书:
./certbot-auto renew
注意如果证书还有较长时间才会过期,那么证书并不会得到更新,并会得到类似如下输出:
Requesting root privileges to run certbot...
  /home/zzz.buzz/.local/share/letsencrypt/bin/letsencrypt renew
Saving debug log to /var/log/letsencrypt/letsencrypt.log

-------------------------------------------------------------------------------
Processing /etc/letsencrypt/renewal/gitlab.zzz.buzz.conf
-------------------------------------------------------------------------------
Cert not yet due for renewal

The following certs are not due for renewal yet:
  /etc/letsencrypt/live/gitlab.zzz.buzz/fullchain.pem (skipped)
No renewals were attempted.
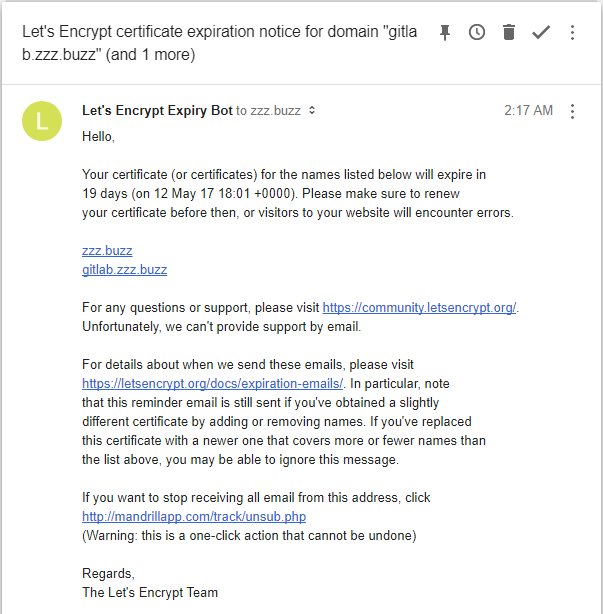
而如果证书即将过期(有效期不足 20 天,10 天和 1 天时),用户却还未执行命令更新证书,那么 Let's Encrypt 会自动发邮件至申请证书时所留的邮件地址,提醒更新证书。
更新完证书后,还需要让 nginx 重新加载新证书:
sudo gitlab-ctl hup nginx
除了手动执行外,也可以把以上命令加入 cron 任务来定时执行。
使用以下命令来编辑 cron 任务:
sudo su -
crontab -e
在打开的文件中,添加以下内容:
0 3 * * 1 /home/zzz.buzz/certbot/certbot-auto renew && gitlab-ctl hup nginx
以上命令会在每周一的 3 点尝试更新证书,即如果证书将在 30 日内过期,则会被更新,否则将不会被更新;
同时还会发送 HUP 信号给 nginx 进程,以使其加载新证书。
注意将 certbot-auto 的路径替换为实际的路径。
在 GitLab 中应用证书
配置 GitLab 使用 HTTPS 协议
修改 /etc/gitlab/gitlab.rb 文件,配置 external_url 为 https 开头的地址,如:
external_url 'https://gitlab.zzz.buzz'
如果需要将经过 HTTP 的流量重定向至 HTTPS 还需要在 /etc/gitlab/gitlab.rb 文件中,进行如下配置:
nginx['redirect_http_to_https'] = true
配置证书
配置 GitLab 将要使用的证书有两种方式,一种是将之前通过 Let's Encrypt 申请的证书放置到 GitLab 默认要求的配置,如下文链接证书所示;另一种则是修改 GitLab 的配置文件,将证书的路径指向之前通过 Let's Encrypt 申请的证书,如下文修改配置所示。两种方式选一即可。
配置方法一:链接证书
根据通过 Omnibus 安装的 GitLab 的默认配置,会寻找存放在 /etc/gitlab/ssl/ 目录下的 www.example.com.key 和 www.example.com.crt 文件,其中的 www.example.com 应当替换为在上文中 external_url 里设置的域名。
我们可以通过如下命令来将之前通过 Let's Encrypt 申请的证书链接到所需的位置。
# 切换至 root 用户(如已是 root 用户,则无需此步)
sudo su -

# 使用 root 用户执行以下命令
mkdir -p /etc/gitlab/ssl
chmod 700 /etc/gitlab/ssl
cd /etc/gitlab/ssl
ln -s ../../letsencrypt/live/www.example.com/fullchain.pem www.example.com.crt
ln -s ../../letsencrypt/live/www.example.com/privkey.pem www.example.com.key
配置方法二:修改配置
修改 GitLab 的配置文件 /etc/gitlab/gitlab.rb,添加以下内容:
nginx['ssl_certificate'] = "/etc/letsencrypt/live/www.example.com/fullchain.pem"
nginx['ssl_certificate_key'] = "/etc/letsencrypt/live/www.example.com/privkey.pem"
启用新配置
配置完成后,使用如下命令启用新配置:
sudo gitlab-ctl reconfigure
参考
Let's Encrypt
- Getting Started - Let's Encrypt - Free SSL/TLS Certificates
- Introduction — Let's Encrypt documentation
- certbot/certbot